
Weslo Cadence G 5.9 Treadmill: A Comprehensive Manual
This manual guides users through setup‚ operation‚ maintenance‚ and safety features of the Weslo Cadence G 5.9.
It also covers connectivity‚ warranty details‚ and troubleshooting assistance.
Welcome to the Weslo Cadence G 5.9 treadmill experience! This fitness companion is designed to help you achieve your health and wellness goals from the comfort of your home. Before embarking on your fitness journey‚ carefully review this manual to ensure proper setup‚ safe operation‚ and optimal performance.
The Cadence G 5.9 offers a range of features‚ including adjustable incline levels and variable speed settings‚ catering to diverse fitness levels. Understanding the console functions and utilizing available programming options will enhance your workout experience. This manual provides step-by-step instructions for assembly‚ operation‚ and routine maintenance‚ maximizing the lifespan of your treadmill.
Furthermore‚ we’ll cover essential safety precautions‚ including the use of the safety key and weight limitations. Remember to verify your YouTube account for potential fitness app integration and access to helpful tutorials. Enjoy your new Weslo treadmill!
Unboxing and Initial Setup
Carefully unpack all components from the shipping box‚ verifying that all parts listed in the parts identification section are present. Inspect each component for any shipping damage; if damage is found‚ contact customer support immediately. Retain the original packaging for potential returns or warranty claims.
Begin the initial setup by placing the treadmill frame on a level surface with at least eight feet of clearance around it. Ensure the power cord is easily accessible to a grounded outlet. Before connecting to power‚ familiarize yourself with the console and its basic functions.
It’s crucial to verify your YouTube account for potential access to setup videos and troubleshooting guides. Do not fully tighten all bolts until the entire assembly is complete‚ allowing for adjustments during the process. Following these steps will ensure a smooth and safe initial setup of your Weslo Cadence G 5.9.
Parts Identification
The Weslo Cadence G 5.9 treadmill includes several key components. These are the Treadmill Base‚ Uprights (left and right)‚ Deck‚ Motor Cover‚ Console‚ Handrails (left and right)‚ and a Safety Key. Additional parts include various bolts‚ washers‚ and screws for assembly‚ alongside the Power Cord and User’s Manual.
Carefully compare the physical parts with the illustrated parts list within this manual. Identifying each component before assembly will streamline the process and prevent confusion. Note the different sizes and types of bolts – proper identification is crucial for secure assembly.
For assistance with YouTube setup or troubleshooting‚ verifying your account may unlock helpful video guides. Ensure all parts are accounted for before proceeding; contacting customer support for missing components is recommended. Familiarizing yourself with these parts now will aid in future maintenance and repairs.
Assembly Instructions
Follow these detailed steps for safe and correct assembly of your Weslo Cadence G 5.9 treadmill. Proper construction ensures optimal performance and longevity.
Step-by-Step Assembly Guide
Begin by carefully unpacking all components and verifying against the parts list. Lay out a protective covering to prevent scratching during assembly. First‚ attach the front and rear stabilizers to the base frame using the provided bolts – ensure they are firmly tightened but not overstressed. Next‚ connect the uprights to the assembled base‚ again using the designated hardware.
Pay close attention to the orientation of each part‚ referencing the diagrams in this manual. Once the uprights are secure‚ carefully position the deck assembly onto the base frame‚ aligning the mounting points. Secure the deck with the appropriate bolts‚ ensuring smooth operation. Finally‚ install the motor cover‚ concealing the motor and electronics. Double-check all connections for tightness and stability before proceeding.
Attaching the Uprights
Carefully position the left and right uprights onto the base frame‚ aligning the pre-drilled holes. Ensure the console masts face inwards‚ towards each other. Use the M8 bolts and washers provided‚ inserting them through the base frame and into the uprights. Hand-tighten initially to allow for adjustments.
Once both uprights are loosely attached‚ verify their vertical alignment using a level. Adjust as needed before fully tightening the bolts with the provided wrench. Tighten in a criss-cross pattern to distribute pressure evenly and prevent wobbling. Do not overtighten‚ as this could damage the frame or strip the threads. Confirm a secure and stable connection before proceeding to the next assembly step. A properly attached upright is crucial for safe operation.
Connecting the Deck and Motor Cover
Position the motor cover onto the treadmill frame‚ ensuring the wiring harness is correctly aligned with the motor. Secure the cover using the designated screws – typically Phillips head – provided in the hardware pack. Do not force the cover; proper alignment is key for a snug fit.
Next‚ carefully lower the treadmill deck onto the assembled frame‚ aligning the rear roller brackets with the corresponding slots. Ensure the deck sits flush against the frame. Attach the deck using the appropriate bolts and washers‚ tightening them securely. Double-check that all bolts are firmly fastened to prevent instability during use. The motor cover protects vital components‚ while the deck provides the running surface.
Installing the Safety Key
The safety key is a crucial component for safe treadmill operation. Locate the safety key and the designated receiver slot‚ usually near the console. Insert the safety key fully into the receiver. The treadmill will not power on without the safety key properly installed. Attach the safety key clip to your clothing – a shirt collar or waistband is recommended – ensuring free movement.
This key serves as an emergency stop mechanism. If you stumble or fall‚ the key will detach‚ instantly halting the treadmill belt. Regularly test the safety key functionality before each workout to confirm it’s working correctly. Never operate the treadmill without a functioning safety key. Proper installation and use are vital for preventing injuries and ensuring a secure exercise experience.
Operation and Features
Explore the Weslo Cadence G 5.9’s functionalities‚ including power-on procedures‚ incline adjustments‚ speed controls‚ and a detailed console overview for optimal workouts.
Powering On and Initial Use
Before your first workout‚ ensure the treadmill is properly assembled and the safety key is securely attached. Plug the power cord into a grounded outlet. The console will illuminate‚ initiating a self-test. Familiarize yourself with the console’s layout – locate the power button‚ speed controls‚ incline adjustments‚ and display screen.
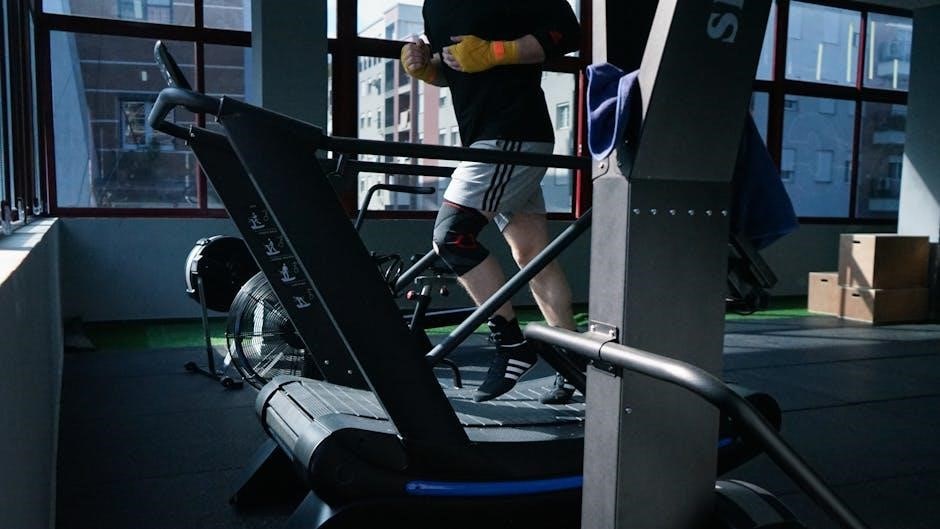
To begin‚ press the power button. Start at the lowest speed setting and gradually increase it to your desired pace. Always maintain a firm grip on the handrails‚ especially during initial use. Begin with a walking pace to acclimate yourself to the treadmill’s motion.
Experiment with the incline feature to add intensity to your workout. Monitor the console display for vital statistics like speed‚ incline‚ time‚ distance‚ and estimated calories burned. Remember to stay hydrated and listen to your body‚ stopping if you experience any discomfort. A proper warm-up and cool-down are crucial for a safe and effective workout.
Adjusting the Incline
The Weslo Cadence G 5.9 treadmill features manual incline adjustment‚ allowing you to simulate hill climbs and increase workout intensity. Locate the incline adjustment knob‚ typically positioned near the front of the treadmill deck. Rotating this knob upwards increases the incline level‚ while rotating it downwards decreases it.
The treadmill usually offers several incline positions‚ each corresponding to a different degree of elevation. Start with a lower incline setting and gradually increase it as your fitness level improves. Be cautious when adjusting the incline while the treadmill is in motion; maintain a firm grip on the handrails for stability.
Higher incline levels engage different muscle groups‚ particularly the glutes and hamstrings‚ providing a more challenging workout. Remember to adjust the speed accordingly when changing the incline to maintain a comfortable and controlled pace. Always return the incline to the lowest setting before stepping off the treadmill.
Speed Control and Programming
The Weslo Cadence G 5.9 treadmill offers intuitive speed control via buttons on the console. These buttons allow you to incrementally increase or decrease the treadmill belt’s speed‚ providing precise control over your workout intensity. The console displays the current speed‚ typically in miles per hour (MPH) or kilometers per hour (KPH).
While the G 5.9 is a basic model‚ it may include pre-programmed workout routines designed to vary speed and incline automatically. These programs offer diverse training options‚ such as hill climbs‚ interval training‚ or fat-burning workouts. Select a program using the console buttons and follow the on-screen prompts.
Experiment with different speed settings and programs to find what best suits your fitness goals. Remember to start at a comfortable pace and gradually increase the speed as you warm up. Always be prepared to use the emergency stop feature if needed.
Console Overview and Display Functions
The Weslo Cadence G 5.9 treadmill console serves as the central hub for controlling and monitoring your workouts. It typically features buttons for power‚ speed adjustment‚ incline control‚ and program selection. The display screen provides real-time feedback on key workout metrics.
Commonly displayed information includes speed (MPH or KPH)‚ incline level (in percentage)‚ workout time‚ distance traveled‚ and estimated calories burned. Some models may also show heart rate data if a compatible heart rate monitor is connected. The console may have a basic LCD screen or a more advanced LED display.
Familiarize yourself with the button layout and display functions before starting your workout. Understanding the console’s features will help you effectively track your progress and customize your training experience. Refer to the console’s diagram in the parts identification section for specific button locations.

Maintenance and Troubleshooting
Regular upkeep ensures optimal performance and longevity. This section details cleaning‚ belt adjustments‚ error code resolutions‚ and proper lubrication procedures for your treadmill.
Regular Cleaning Procedures
Maintaining a clean treadmill is crucial for its performance and your safety. After each use‚ wipe down the console‚ handrails‚ and side rails with a damp‚ non-abrasive cloth. This removes sweat and dust‚ preventing buildup; Avoid using harsh chemicals or solvents‚ as they can damage the surfaces.
Weekly‚ vacuum around and under the treadmill to remove dust and debris. Pay close attention to the area around the motor cover‚ ensuring proper ventilation. Monthly‚ inspect the power cord for any damage and ensure it’s securely connected. A slightly damp cloth can be used on the deck‚ but ensure it’s completely dry before use.
Periodically check the safety key for cleanliness. Never spray liquids directly onto the console or motor components. Always unplug the treadmill before performing any cleaning beyond a quick wipe-down. Consistent cleaning extends the treadmill’s lifespan and ensures a hygienic workout environment.
Belt Maintenance and Adjustment
Proper belt maintenance is vital for smooth operation and preventing premature wear. Regularly inspect the treadmill belt for signs of wear‚ such as fraying or cracking. If the belt feels loose‚ it requires adjustment. Use the rear adjustment knob to tighten the belt; small increments are best‚ followed by testing.
A properly tensioned belt should not slip during use. If slipping persists‚ consult the full manual for detailed adjustment instructions. Periodically lubricate the belt with a silicone-based lubricant (avoiding oil-based products) to reduce friction and extend its lifespan. Apply lubricant under the belt‚ following the manufacturer’s guidelines.
Ensure the belt is centered on the rollers. If it drifts to one side‚ make minor adjustments using the alignment screws at the rear roller. Always unplug the treadmill before performing any belt adjustments or lubrication. Consistent maintenance ensures optimal performance and safety.
Troubleshooting Common Issues (Error Codes)
If the console displays an error code‚ consult this section for potential solutions. A common issue is an “E1” code‚ often indicating a communication error between the console and the motor controller – try restarting the treadmill. “E2” typically signals a motor overload; reduce speed and incline‚ and if the problem persists‚ contact support.
If the treadmill stops abruptly‚ check the safety key and ensure it’s securely inserted. A flashing display might indicate a power supply issue; verify the power cord is firmly connected. Belt slippage can cause an “E3” error‚ requiring belt adjustment as detailed in the maintenance section.
For any unresolved error codes or unusual behavior‚ refer to the complete troubleshooting guide in the manual or contact Weslo customer support. Document the error code and circumstances when contacting support for faster assistance. Regular maintenance can prevent many issues.
Lubrication Guide
Maintaining proper belt lubrication is crucial for smooth operation and extending the life of your Weslo Cadence G 5.9 treadmill. Use only silicone-based lubricant specifically designed for treadmills; avoid oil or water-based products‚ as they can damage the deck. Apply lubricant every 25 hours of use‚ or approximately every month with moderate use.
To lubricate‚ lift the belt slightly to access the deck beneath. Apply a thin‚ even strip of lubricant along the center of the deck‚ ensuring full coverage. Avoid over-lubrication‚ as excess lubricant can attract dust and debris. After application‚ walk on the treadmill at a slow speed for a few minutes to distribute the lubricant evenly.
Regularly inspect the deck for dryness and reapply lubricant as needed. Proper lubrication reduces friction‚ minimizes wear and tear‚ and ensures a quiet‚ comfortable workout experience. Refer to the maintenance schedule for optimal lubrication intervals.

Safety Precautions
Prioritize safety by understanding the safety key‚ weight limits‚ proper usage‚ and emergency stop procedures. Always follow guidelines for a secure workout.
Understanding the Safety Key
The safety key is a crucial component for safe treadmill operation. It’s designed to automatically stop the treadmill belt if you stumble or fall during your workout. This key magnetically attaches to the console and is tethered to your clothing via a clip.
Proper usage is essential: Always attach the clip to a secure part of your clothing – a waistband or pocket – before starting. Never operate the treadmill without the safety key properly engaged. If the key becomes detached during use‚ the treadmill will immediately halt‚ preventing potential injuries.
Regularly inspect the key and clip for any signs of damage or wear. A faulty key or clip could compromise its functionality. If you notice any issues‚ discontinue use and contact Weslo customer support for a replacement. Familiarize yourself with the key’s location and operation before each workout to ensure a safe and enjoyable exercise experience.
Maximum User Weight and Limitations
The Weslo Cadence G 5.9 treadmill has a maximum user weight capacity of 300 pounds (136 kilograms). Exceeding this limit can compromise the treadmill’s structural integrity‚ potentially leading to malfunction or injury. It’s vital to adhere to this weight restriction for safe and optimal performance.
Beyond weight‚ consider usage limitations. This treadmill is designed for home use only and is not intended for commercial applications. Continuous use exceeding three hours daily may reduce the lifespan of components. Avoid allowing multiple users to operate the treadmill simultaneously.
Individuals with pre-existing medical conditions should consult a physician before using the treadmill. Be mindful of your physical limitations and start with low-intensity workouts‚ gradually increasing the difficulty as your fitness improves. Always prioritize safety and listen to your body.
Proper Treadmill Usage
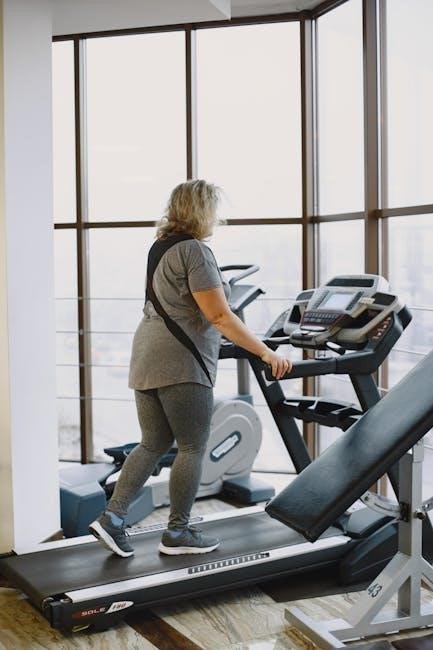
Always wear appropriate athletic shoes and clothing when operating the Weslo Cadence G 5.9. Avoid loose garments that could become entangled in the machine. Begin each workout with a warm-up period of stretching and light cardio to prepare your muscles.
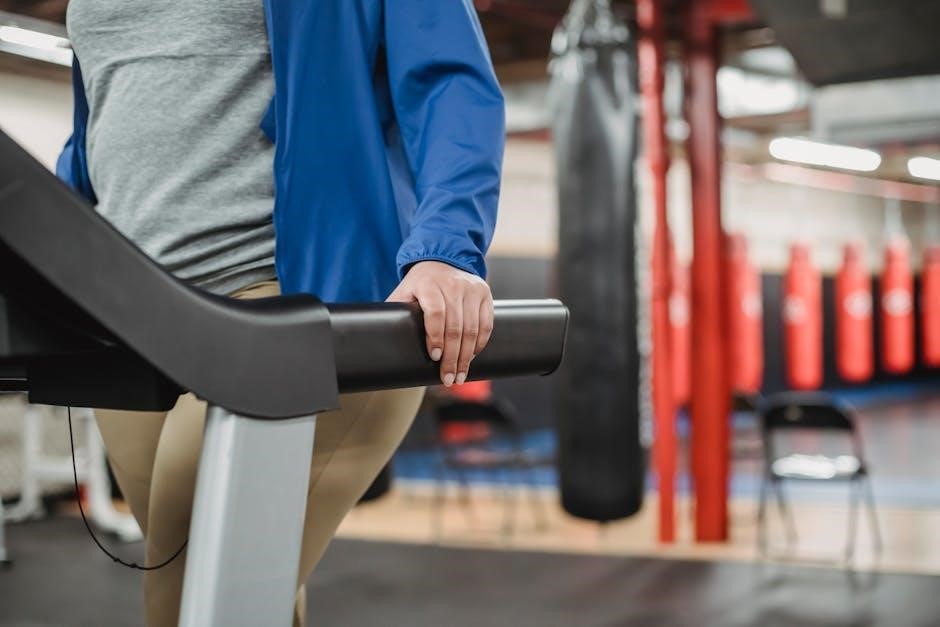
Maintain a centered position on the running deck‚ holding the handrails if needed‚ especially during incline adjustments or speed changes. Avoid looking down at your feet; instead‚ focus on a point straight ahead. Use the safety key as intended – clipped to your clothing and readily accessible.
Gradually increase and decrease speed and incline to avoid sudden jolts. Cool down after each workout with stretching exercises. Never step off a moving treadmill. Always use the emergency stop function if you feel unstable or experience any discomfort.
Emergency Stop Procedures
The Weslo Cadence G 5.9 is equipped with multiple safety mechanisms‚ primarily the safety key and the emergency stop button. In an emergency‚ immediately pull the safety key from the console; this will instantly halt the treadmill belt. Familiarize yourself with the location of the emergency stop button on the console before each use.
If you lose your balance or experience any discomfort‚ do not attempt to jump off the moving treadmill. Instead‚ activate the emergency stop immediately. Practice locating and using both the safety key and the emergency stop button during a slow walk to build muscle memory.
After an emergency stop‚ allow the treadmill to come to a complete halt before stepping off. Inspect the treadmill for any visible damage before resuming use. If unsure‚ contact customer support for assistance.

Advanced Features & Connectivity (If Applicable)
This treadmill may offer Bluetooth connectivity for app integration and user profiles‚ enhancing workout tracking and providing access to diverse fitness programs.
Bluetooth Connectivity (If Equipped)
If your Weslo Cadence G 5.9 treadmill is equipped with Bluetooth technology‚ you can wirelessly connect it to compatible devices like smartphones or tablets. This connectivity unlocks a range of enhanced features designed to elevate your fitness experience. Pairing your device allows you to stream music directly through the treadmill’s speakers‚ providing motivational soundtracks during your workouts.
Furthermore‚ Bluetooth enables seamless integration with popular fitness applications. These apps can track your workout data – including speed‚ distance‚ time‚ and calories burned – providing detailed insights into your progress. Data synchronization allows you to monitor your performance trends over time and set personalized fitness goals. Explore compatible apps to discover interactive training programs and virtual running routes‚ adding variety and engagement to your routine. Ensure your device’s Bluetooth is enabled and follow the on-screen prompts for a successful connection.
Integration with Fitness Apps
The Weslo Cadence G 5.9 treadmill‚ when paired via Bluetooth‚ offers integration with a variety of popular fitness applications. This connectivity transforms your workout data into actionable insights‚ enhancing your fitness journey. Compatible apps allow for automatic synchronization of key metrics such as distance‚ speed‚ time‚ and calories expended‚ eliminating manual logging.
Popular choices include apps designed for tracking running performance‚ offering detailed analysis of your pace‚ stride length‚ and elevation gain. Others focus on broader fitness goals‚ providing personalized workout plans and nutritional guidance. Explore options like MyFitnessPal for calorie tracking or Strava for route mapping and social sharing. Seamless data transfer empowers you to monitor progress‚ identify areas for improvement‚ and stay motivated. Check app compatibility lists for the most up-to-date information and enjoy a more connected and informed workout experience.

User Profiles and Data Tracking
The Weslo Cadence G 5.9 treadmill’s console allows for the creation of multiple user profiles‚ catering to households with diverse fitness levels and goals. Each profile independently stores workout data‚ providing a personalized experience for every user. Track essential metrics like distance‚ time‚ speed‚ incline‚ and estimated calories burned with each session.
This feature enables individual progress monitoring and facilitates friendly competition within the family. The console displays historical workout data‚ allowing users to review past performance and identify trends. While the treadmill itself offers basic data storage‚ integration with fitness apps (via Bluetooth) expands tracking capabilities. Export workout data to external platforms for more in-depth analysis and long-term progress visualization. Regularly reviewing your data empowers you to adjust your training regimen and achieve optimal results.

Warranty Information
Weslo provides a warranty covering the frame‚ motor‚ and parts for the Cadence G 5.9. Contact customer support for specific details and claim procedures.
Weslo Warranty Details
The Weslo Cadence G 5.9 treadmill warranty offers varying coverage periods for different components‚ ensuring peace of mind for owners. The frame is typically covered for a substantial period‚ often up to a lifetime‚ protecting against structural defects; The motor‚ a crucial component‚ usually benefits from a warranty ranging from one to three years‚ safeguarding against malfunctions.
Parts and electronics generally have a shorter warranty duration‚ commonly around 90 days to one year‚ covering manufacturing defects. Labor costs associated with repairs may also be included for a limited time. It’s crucial to register your treadmill promptly after purchase to activate the warranty.
Keep your proof of purchase safe‚ as it’s required for any warranty claims. The warranty doesn’t cover normal wear and tear‚ damage from misuse‚ or unauthorized modifications. For complete warranty terms and conditions‚ refer to the official Weslo documentation included with your treadmill or visit the Weslo website.
Contacting Customer Support
Weslo provides multiple avenues for customers needing assistance with their Cadence G 5.9 treadmill. For immediate support‚ a comprehensive online help center is available on the Weslo website‚ featuring FAQs‚ troubleshooting guides‚ and downloadable resources. You can often find solutions to common issues quickly through self-service options.
If you require direct assistance‚ Weslo offers customer support via phone. The contact number is readily available on their website and in the product documentation. Live chat support is also frequently offered‚ providing real-time interaction with a customer service representative;
When contacting support‚ have your treadmill’s model number and serial number handy to expedite the process. Be prepared to describe the issue in detail. Social media channels may also offer support‚ though response times can vary. Ensure you document all interactions for future reference.