
Canon’s EOS 7D Mark II is a robust DSLR, offering 20.2MP, rapid shooting, and advanced AF – ideal for action and wildlife, as detailed in this manual.
Overview of the Camera
The Canon EOS 7D Mark II stands as a high-performance Digital SLR, expertly engineered for capturing dynamic subjects with exceptional clarity. Boasting a 20.2MP CMOS sensor and dual DIGIC 6 processors, it delivers impressive image quality and speed. This camera excels in continuous shooting, reaching up to 10 frames per second.
Its advanced autofocus system ensures precise tracking, making it a favorite among sports and wildlife photographers. This manual will guide you through harnessing its full potential.
Key Features and Benefits
The Canon EOS 7D Mark II delivers a compelling blend of speed and image quality. Key features include its 20.2MP CMOS sensor, dual DIGIC 6 processors, and a remarkable 10 fps continuous shooting capability. Benefit from a highly responsive 19-point AF system, ideal for tracking fast-moving subjects.
Full HD video recording and robust build quality further enhance its versatility, as detailed within this manual.
Intended Audience for this Manual
This manual is designed for all Canon EOS 7D Mark II users, from photography enthusiasts to professionals. Whether you’re new to DSLR cameras or upgrading from a previous model, this guide provides comprehensive instructions. It caters to those seeking to master the camera’s features,
including shooting modes, autofocus, and advanced settings, ensuring optimal image and video quality.
Camera Components and Controls
This section details the Canon EOS 7D Mark II’s physical parts – front, rear, and top panels – and explains each control’s function for easy operation.
Front Panel Features
The Canon EOS 7D Mark II’s front panel houses essential controls. You’ll find the lens release button, enabling quick lens changes, and the depth-of-field preview lever, simulating aperture effects. Additionally, there are focus point selection and drive mode buttons, offering direct access to key shooting settings. The microphone input allows for external audio recording, enhancing video capabilities. Understanding these features streamlines operation and provides immediate control over crucial camera functions, improving your photographic workflow.
Rear Panel Features
The Canon EOS 7D Mark II’s rear panel is central to operation. It features a large, high-resolution LCD screen for image review and menu navigation. Key controls include the multi-controller for AF point selection, the SET button for confirming choices, and the Quick Control dial for swift setting adjustments. The menu and INFO buttons provide access to comprehensive camera functions, while playback buttons facilitate easy image browsing and deletion.
Top Panel Features
The Canon EOS 7D Mark II’s top panel houses essential controls for immediate access. A prominent power switch, shutter button, and main dial govern camera operation. The mode dial selects shooting modes, while dedicated buttons manage ISO, white balance, and AF selection. A conveniently placed video record button initiates movie capture, and the LCD panel displays crucial shooting information at a glance, ensuring efficient control.

Setting Up the Camera
Proper setup involves inserting the battery and a compatible memory card, followed by configuring initial settings like date, time, and copyright details for optimal use.
Inserting the Battery and Memory Card
To begin, locate the battery compartment door on the camera’s bottom. Release the latch and insert the Canon LP-E6N battery pack, ensuring correct alignment, until it clicks into place. Next, open the memory card slot cover, also on the bottom, and insert a compatible SD card – UHS-I is recommended – until it locks. Confirm proper insertion before powering on the camera; incorrect installation may prevent operation or cause damage. Always handle components with care.
Initial Camera Settings
Upon powering on, the 7D Mark II will prompt you to set the language, date, and time. Use the dials and buttons to navigate and confirm each selection. Subsequently, choose your shooting mode – often starting with Scene Intelligent Auto is recommended for beginners. Familiarize yourself with the menu system to customize settings like image quality (RAW or JPEG) and autofocus behavior. These initial configurations establish your preferred workflow.
Date, Time, and Copyright Information
Accurate date and time settings are crucial for proper image organization and metadata. Access these settings via the camera’s menu. You can also input your copyright information – author and copyright notice – which will be embedded into the image files. This protects your work and provides ownership details. Ensure these details are correctly entered for professional use and archiving purposes.

Shooting Modes
The 7D Mark II offers Auto, Creative (Program, Aperture/Shutter Priority, Manual), and customizable User Defined modes for versatile shooting experiences.
Auto Modes (Scene Intelligent Auto, etc.)
The Canon EOS 7D Mark II simplifies photography with several automatic modes. Scene Intelligent Auto intelligently detects the scene and optimizes camera settings for excellent results. Other convenient options include Portrait, Landscape, Sports, Close-up, and Night modes, each pre-configured for specific shooting situations. These modes allow beginners to capture high-quality images without needing to adjust complex settings, ensuring ease of use and consistently pleasing outcomes.
Creative Modes (Program, Aperture-Priority, Shutter-Priority, Manual)
For greater control, the 7D Mark II offers creative shooting modes. Program (P) allows the camera to select aperture and shutter speed, while Aperture-Priority (Av) lets you control depth of field. Shutter-Priority (Tv) governs motion blur, and Manual (M) provides full control over both settings. These modes empower experienced photographers to fine-tune images, achieving desired artistic effects and mastering exposure for optimal results.
Custom Shooting Modes (User Defined Modes)
The Canon EOS 7D Mark II features three User Defined modes (C1, C2, and C3) for saving and quickly recalling personalized camera settings. These allow photographers to pre-configure combinations of settings – ideal for frequently used shooting scenarios. Customize settings like AF, image quality, and metering, then instantly apply them, streamlining workflow and ensuring consistent results across diverse photographic situations.

Autofocus System
The 7D Mark II boasts an advanced AF system with selectable modes, including AI Servo for tracking and One-Shot for stationary subjects, ensuring sharp focus.
AF Point Selection Modes
The Canon EOS 7D Mark II offers versatile AF point selection. You can choose from single-point AF for precise control, zone AF for tracking within a defined area, and automatic selection for general use. Additionally, AF point expansion provides broader coverage around your selected point. Manual selection allows pinpoint accuracy, while the camera’s intelligent tracking system dynamically adjusts to maintain focus on moving subjects, offering photographers adaptable options for diverse shooting scenarios and ensuring consistently sharp images.
AI Servo AF for Tracking Moving Subjects
AI Servo AF excels at maintaining focus on erratic, fast-moving subjects. This mode continuously tracks focus as long as the shutter button is half-pressed. The 7D Mark II’s advanced algorithms predict subject movement, ensuring sharp results even during unpredictable action. Customize tracking sensitivity to match the subject’s speed and direction. Utilizing all 19 AF points, AI Servo delivers consistent, reliable performance for sports, wildlife, and any dynamic scene, capturing crucial moments with clarity.
One-Shot AF for Stationary Subjects
One-Shot AF is perfect for subjects that aren’t moving. When you half-press the shutter button, the camera locks focus on the selected AF point. This mode prioritizes achieving sharp focus before capturing the image, ideal for portraits, landscapes, or any static scene. Once focus is locked, it remains fixed until you release and re-press the shutter button, ensuring precise image capture every time.

Exposure Control
Mastering aperture, shutter speed, and ISO is crucial for optimal image quality; utilize exposure compensation and metering modes for precise control.
Understanding Aperture, Shutter Speed, and ISO
Aperture controls depth of field, influencing how much of the image is in focus; lower f-numbers create shallow depth, while higher numbers increase it. Shutter speed dictates motion blur – faster speeds freeze action, slower speeds allow for creative blur. ISO measures the sensor’s sensitivity to light; lower ISOs produce cleaner images, but require more light, while higher ISOs perform better in low-light situations but may introduce noise. Balancing these three elements is key to achieving proper exposure and desired creative effects.
Exposure Compensation
Exposure compensation allows you to fine-tune the camera’s automatically determined exposure. When the camera underestimates or overestimates the correct exposure, use the +/- button to adjust. Positive values brighten the image, useful for dark scenes, while negative values darken it, ideal for bright conditions. This ensures accurate exposure based on your creative intent, overriding the camera’s metering system when necessary for optimal results.
Metering Modes
The Canon EOS 7D Mark II offers several metering modes to suit various shooting scenarios. Evaluative metering analyzes the entire scene for balanced exposure. Partial metering focuses on a small area, useful for backlit subjects. Spot metering measures a very small point, ideal for precise control. Center-weighted average metering prioritizes the center of the frame. Selecting the appropriate mode ensures accurate exposure for your desired composition.
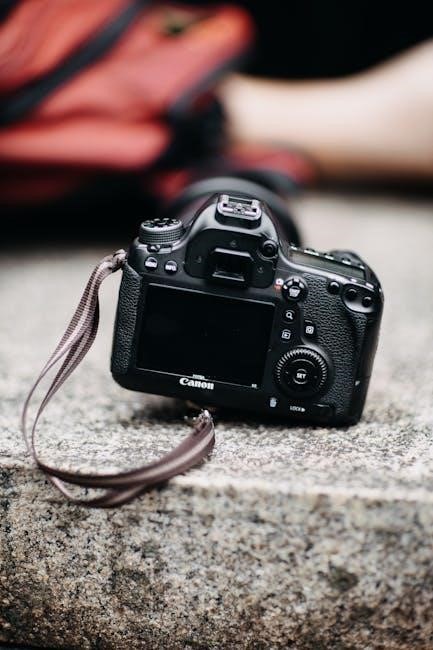
Image Quality and File Formats
Choose between RAW for maximum editing flexibility or JPEG for convenience; adjust image size and compression to balance quality and storage space.
RAW vs. JPEG
RAW files capture all image data recorded by the sensor, offering extensive post-processing control for adjustments to white balance, exposure, and more, without quality loss. However, RAW files are larger. JPEG files are compressed, resulting in smaller file sizes, ideal for immediate use and sharing, but with some data loss. Selecting RAW provides maximum editing latitude, while JPEG offers convenience and efficient storage, depending on your workflow and desired level of control.
Image Size and Compression
The Canon EOS 7D Mark II allows selection of various image sizes, from large to small, impacting file resolution and print quality. Compression options – Large, Medium, and Small – further affect file size. Higher resolution and lower compression retain more detail but create larger files. Choosing appropriate settings balances image quality with storage capacity, considering intended use, like web display versus large-format printing.
White Balance Settings
The Canon EOS 7D Mark II offers diverse White Balance settings to ensure accurate color rendition under varying light sources. Presets include Daylight, Cloudy, Tungsten, and Fluorescent. Custom White Balance allows precise calibration using a white or gray card. Auto White Balance generally performs well, but manual adjustment provides optimal results, especially in challenging lighting conditions, guaranteeing natural-looking colors in your photographs.

Video Recording
The Canon EOS 7D Mark II captures Full HD video, offering customizable settings for resolution, frame rates, and audio control, as explained in this manual.
Video Recording Settings
This section details the Canon EOS 7D Mark II’s extensive video settings. Users can adjust resolution (1080p Full HD is standard), frame rates (24p, 30p, 60p for varied motion effects), and codec options for file size versus quality. Explore settings for manual or automatic exposure during recording, and customize audio levels.
Understanding these options, as outlined in this manual, allows for professional-looking video results.
Audio Recording Options
The Canon EOS 7D Mark II offers versatile audio control for video. This manual section explains how to connect external microphones via the 3.5mm input, adjusting levels manually or utilizing automatic gain control. Explore options for monitoring audio through headphones during recording, ensuring optimal sound quality; Disable internal audio if only using an external source for cleaner results.
Movie Servo AF
This manual details Canon’s Movie Servo AF, crucial for maintaining focus on moving subjects during video recording with the EOS 7D Mark II. It continuously tracks subjects, adjusting focus automatically. Customize tracking sensitivity to suit the scene’s pace. Explore face detection and tracking options for enhanced subject lock, ensuring sharp, professional-looking footage.

Menu Navigation and Customization
This manual guides you through the EOS 7D Mark II’s menu system, explaining custom functions and the ‘My Menu’ feature for personalized settings.
Understanding the Menu System
The Canon EOS 7D Mark II’s menu is logically organized into several tabs: Shooting, AF, Exposure, Quality, and Setup. Each tab contains numerous settings to tailor the camera to your specific needs. Navigating is done using the directional buttons and SET button.
This manual details each menu option, explaining its function and available choices. Understanding the menu structure is crucial for unlocking the camera’s full potential and customizing it for optimal performance in various shooting scenarios. Explore and experiment!
Custom Functions
Canon’s EOS 7D Mark II offers extensive customization via its Custom Functions (C.Fn) menu. These allow you to personalize button assignments, control operations, and adjust display settings to match your shooting style.
This manual provides a comprehensive list of available Custom Functions, detailing each option and its effect on camera behavior. Utilizing these functions streamlines your workflow and enhances efficiency, enabling quicker access to frequently used settings during critical moments.
My Menu
The “My Menu” feature on the Canon EOS 7D Mark II allows for personalized menu organization. Register frequently used settings and functions for quick access, eliminating the need to navigate through the entire menu system.
This manual explains how to add, remove, and rearrange items within “My Menu”, tailoring the interface to your specific shooting preferences. Efficiently locate essential controls, boosting your speed and responsiveness in diverse photographic scenarios.
Advanced Features
Explore the 7D Mark II’s capabilities: high-speed continuous shooting, interval timer for time-lapses, and multiple exposure options, as explained in this manual.
High-Speed Continuous Shooting
The Canon EOS 7D Mark II excels in capturing fast action with its impressive high-speed continuous shooting capabilities. This camera boasts a rapid 10 frames per second (fps) shooting rate, allowing photographers to freeze dynamic moments with exceptional clarity.
This feature is invaluable for sports, wildlife, and any scenario demanding quick image capture. The manual details settings for optimizing this function, including autofocus modes and drive settings, ensuring sharp, sequential images even during intense action sequences.
Interval Timer and Time-Lapse Movie
The Canon EOS 7D Mark II offers a built-in interval timer, enabling the creation of stunning time-lapse movies. This feature allows the camera to automatically capture images at pre-set intervals, ranging from seconds to hours.
The manual explains how to configure the interval, shooting duration, and number of shots. These images can then be compiled into a captivating time-lapse movie, showcasing slow changes over extended periods – perfect for landscapes or celestial events.
Multiple Exposure
The Canon EOS 7D Mark II’s multiple exposure feature creatively combines two or more images into a single photograph. This allows for artistic effects, layering textures, or creating surreal compositions. The manual details how to select the number of exposures, blending methods, and image alignment.
You can choose to view the result immediately or review after each shot. Experiment with different settings to achieve unique and visually striking multiple exposure images, expanding your creative possibilities.
Connectivity and Accessories
This manual section covers connecting the Canon EOS 7D Mark II to computers, utilizing remote controls, external flashes, and compatible lens options.
Connecting to a Computer
This manual details connecting your Canon EOS 7D Mark II to a computer for image transfer and potential camera control. Utilize the provided USB cable, ensuring a secure connection. Install the Canon Digital Camera Solution software for streamlined image importing and organization. Alternatively, the camera functions as a mass storage device, allowing direct file access. Proper software installation ensures optimal functionality and compatibility with your operating system, facilitating efficient workflow and data management.
Remote Control and External Flash
This manual explains utilizing compatible remote controls for wireless shutter release, enhancing stability and creative options. Explore Canon’s Speedlite flashes for advanced lighting control, offering TTL and manual modes. Proper flash synchronization settings, detailed within, are crucial for optimal results. Ensure compatibility with your chosen accessories for seamless integration and expanded photographic possibilities, maximizing the 7D Mark II’s potential.
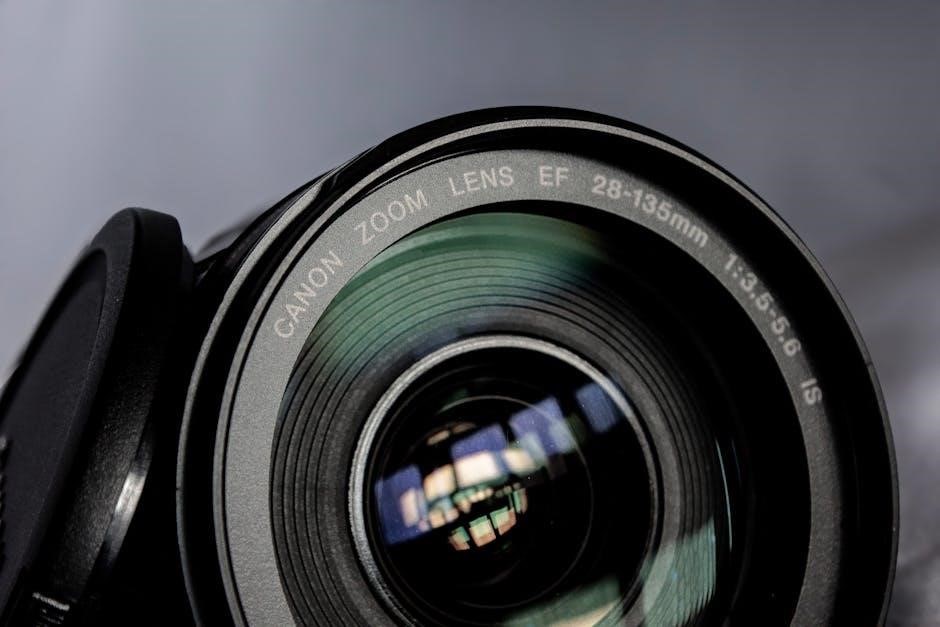
Compatible Lenses
The Canon EOS 7D Mark II accepts a wide range of EF and EF-S lenses, offering versatility for various shooting scenarios. This manual details lens compatibility, including considerations for full-frame versus APS-C lenses. Explore Canon’s extensive lens lineup for optimal performance, from wide-angle to telephoto options. Third-party lenses may also be used, but verify compatibility for full functionality.
Troubleshooting
This section of the manual addresses common issues, error messages, and provides guidance on resetting the Canon EOS 7D Mark II for optimal performance.
Common Issues and Solutions
This section of the manual details frequently encountered problems with the Canon EOS 7D Mark II. It covers issues like autofocus malfunctions, memory card errors, and display problems. Solutions range from simple restarts and battery checks to firmware updates and menu adjustments.
Troubleshooting steps are provided for each issue, guiding users through a logical process to resolve them independently. If problems persist, consulting Canon support is recommended.
Error Messages
The Canon EOS 7D Mark II displays various error messages indicating specific camera issues. This manual section provides a comprehensive list and detailed explanations of each code. Common errors include card errors, lens communication problems, and internal camera malfunctions.
Each message is accompanied by potential causes and recommended solutions, helping users diagnose and address the problem effectively. Refer to this section promptly when an error appears.
Resetting the Camera
This manual section details how to reset your Canon EOS 7D Mark II to its factory default settings. Resetting clears all custom functions, menu selections, and personalized settings, restoring the camera to its original state.
There are two reset options: a simple menu reset and a full factory reset. Use the full reset cautiously, as it erases all user data. Refer to the step-by-step instructions provided for safe operation.