
The Hunter Node 200 is a battery-operated irrigation controller designed for efficient water management in small to medium-sized landscapes. It offers Bluetooth connectivity for remote operation and is part of the Node series, which includes models capable of operating up to 2 solenoids. This controller is ideal for automated watering systems, providing users with a reliable and convenient solution for maintaining healthy plants and turf. Its compact design and ease of use make it a popular choice for both residential and commercial applications.
1.1 Overview of the Hunter Node 200 Controller
The Hunter Node 200 is a battery-operated, Bluetooth-enabled irrigation controller designed for small landscapes. It supports up to 2 stations, offering flexible programming and manual operation. Compact and weather-resistant, it’s ideal for outdoor use, ensuring reliable performance in various conditions. The controller features a user-friendly interface and compatibility with sensors like Freeze-Clik for enhanced functionality.
With a focus on efficiency, the Node 200 allows independent programs and multiple start times. Its battery life and remote access via Bluetooth make it a convenient solution for modern irrigation needs, ensuring optimal watering schedules and water conservation.
1.2 Importance of the Manual for Proper Operation
The Hunter Node 200 manual is essential for understanding and optimizing controller functionality. It provides detailed instructions for installation, programming, and troubleshooting, ensuring efficient watering schedules. The manual helps users avoid common setup mistakes, explains safety precautions, and outlines warranty details. By following the guidelines, users can maximize the controller’s capabilities, such as Bluetooth connectivity and sensor integration, ensuring proper operation and water conservation.
Technical Specifications of the Hunter Node 200
The Hunter Node 200 is a battery-operated, Bluetooth-enabled irrigation controller supporting up to 2 stations. It features independent programs, multiple start times, and a manual cycle option, designed for outdoor use with a weather-resistant enclosure.
2.1 Model Number and Compatibility
The Hunter Node 200 is identified by the model number NODE-200 and is part of the Node series, which includes NODE-400 and NODE-600. It is compatible with Hunter PGV-101G valves and DC latching solenoids (P/N 458200). Designed for outdoor use, the controller works seamlessly with Freeze-Clik sensors and is ideal for small-scale irrigation systems. Its compatibility with various Hunter components ensures flexibility and reliability in different landscaping applications.
2.2 Power Source and Battery Life
The Hunter Node 200 is a battery-operated controller that uses DC power, ensuring reliable performance in outdoor environments. It features a long-lasting battery life of up to three years, depending on usage. The controller includes a battery level indicator to monitor power status. Its energy-efficient design minimizes battery consumption while maintaining consistent irrigation control. This makes it a low-maintenance option for managing watering systems efficiently.
2.3 Number of Zones and Stations
The Hunter Node 200 supports up to 2 zones or stations, allowing precise control over separate areas of your landscape. Each station can be programmed independently, offering flexibility for varying watering needs. The controller accommodates multiple start times and runtime durations, ensuring efficient irrigation management. Its dual-station capability makes it ideal for smaller landscapes or specialized watering requirements, providing a balanced solution for diverse irrigation needs.
2.4 Memory Capacity and Programmability
The Hunter Node 200 offers robust programmability with up to 3 independent programs and 4 start times per program. It supports a maximum station run time of 6 hours and features manual cycle operation for quick overrides. The controller’s memory capacity ensures all programmed settings are stored securely, allowing for consistent and reliable irrigation scheduling. This flexibility makes it easy to tailor watering schedules to specific landscape needs, optimizing water usage efficiently.

Installation and Mounting Guidelines
The Hunter Node 200 is designed for easy installation and mounting. It can be securely attached to plastic Hunter valves using a specialized mounting clip, ensuring stability and convenience for any irrigation setup.
3.1 Mounting the Controller
The Hunter Node 200 controller is easily mounted using a specialized clip designed for Hunter plastic valves, ensuring secure and straightforward installation. This method allows for easy access to the battery compartment while keeping the device protected. The controller should be placed in a location shielded from direct sunlight and moisture to optimize performance and battery life. Mounting in an area with minimal obstructions ensures reliable Bluetooth connectivity for remote operation.
3.2 Connecting Solenoids and Wiring
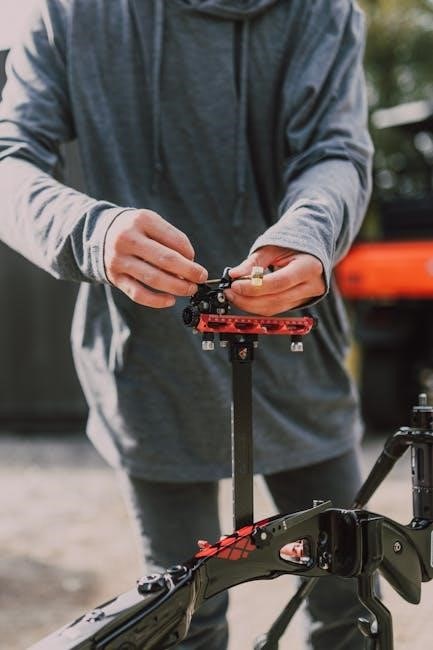
Connect the solenoids to the Hunter Node 200 controller by attaching them to the designated terminals, ensuring correct polarity to avoid damage. Use appropriate wire size and length to minimize voltage drop; Securely fasten connections to prevent moisture ingress. The controller supports DC-latching solenoids, which are recommended for optimal performance. Proper wiring ensures reliable operation of the irrigation system, maintaining efficient water distribution across all zones. Always follow the manufacturer’s guidelines for wiring configurations.
3.3 Installing Sensors and Accessories
Install sensors and accessories like Freeze-Clik and wired rain sensors to enhance the Hunter Node 200’s functionality. Secure sensors in suitable locations to ensure accurate readings. Follow the manufacturer’s guidelines for proper installation and connections. Orient sensors correctly to avoid interference or damage. Proper installation ensures reliable data collection and efficient watering. This step enhances the system’s performance and water conservation capabilities, making it adaptable to various environmental conditions.
Programming the Hunter Node 200
The Hunter Node 200 supports up to 3 independent programs with 4 start times each. It offers a manual cycle feature and a maximum station run time of 6 hours, providing flexible scheduling for efficient watering management.
4.1 Setting the Clock and Date
To set the clock and date on the Hunter Node 200, press and hold the right arrow button to access the menu. Use the navigation buttons to select the clock/date option. Enter the current time and date using the arrow keys, then confirm by pressing the center button. Ensure the time zone is correctly set for accurate scheduling. Properly setting the clock and date is essential for reliable program operation and watering schedules.
4.2 Creating and Managing Watering Programs
To create a watering program on the Hunter Node 200, select a program number and set the start time, duration, and frequency using the arrow buttons. Choose from multiple start times per program and adjust run times up to six hours. Programs can be customized for specific zones, and manual cycles can be activated for quick watering. This feature ensures efficient and tailored irrigation schedules for optimal water use.
4.3 Manual Operation and Override Features
The Hunter Node 200 allows manual operation by pressing and holding the right arrow to activate a station. Users can override scheduled programs temporarily for immediate watering needs. Manual cycles are convenient for quick adjustments without altering the programmed settings. The controller also features a low-battery indicator to ensure timely replacements, maintaining uninterrupted irrigation control and flexibility for users to manage their watering schedules effectively and efficiently.
4.4 Adjusting Settings for Optimal Watering
Adjusting settings on the Hunter Node 200 ensures efficient watering tailored to plant needs. Modify start times, station run times, and program intervals for precision. Utilize sensor compatibility, like Freeze-Clik, to prevent unnecessary watering during unfavorable conditions. Optimize water usage by fine-tuning each station’s operation, ensuring healthy growth while conserving resources. Customizable settings enable flexible irrigation management, adapting to seasonal changes and specific landscape requirements for optimal results. Regular adjustments maintain system efficiency and effectiveness.
Key Features and Benefits
The Hunter Node 200 offers battery operation for convenience, Bluetooth connectivity for remote control, expandability for scalability, and water conservation features for efficient irrigation management.
5.1 Battery-Operated Convenience
The Hunter Node 200’s battery-operated design provides exceptional convenience for irrigation control. Powered by two AA batteries, it offers a battery life of up to 40 months, ensuring long-term reliability. The controller is compatible with DC latching solenoids, optimizing performance and energy efficiency. A built-in battery status indicator alerts users when replacements are needed, preventing unexpected system downtime. This feature makes it ideal for outdoor and remote installations where access to power is limited.
5.2 Bluetooth Connectivity for Remote Control

The Hunter Node 200 features Bluetooth connectivity, enabling remote control and programming via a smartphone app. This functionality allows users to adjust watering schedules, monitor system status, and receive notifications from any location within range. The app provides a user-friendly interface for customization, ensuring efficient water management without physical access to the controller. This advanced feature enhances convenience and flexibility for modern irrigation systems.
5.3 Expandability and Scalability
The Hunter Node 200 is designed to adapt to growing needs, supporting up to 2 stations and allowing easy integration with additional sensors and accessories. Its modular design enables users to expand functionality by connecting devices like rain sensors or Freeze-Clik for enhanced water conservation. Additionally, the system can be upgraded to higher models in the Node series, offering scalability for larger irrigation requirements. This flexibility ensures long-term reliability and adaptability for various landscape setups.
5.4 Water Conservation and Efficiency
The Hunter Node 200 promotes water conservation through smart features like rain and freeze sensors, which automatically pause irrigation during unfavorable conditions. Its manual cycle option allows for on-demand watering without starting a full program, reducing unnecessary water use. The system also supports adjustable run times and compatibility with weather-based sensors, ensuring efficient watering schedules tailored to specific landscape needs. This enhances water savings while maintaining plant health.

Troubleshooting Common Issues
The Hunter Node 200 may face issues like power malfunctions, sensor connectivity problems, or wiring faults. Diagnosing these requires checking battery levels, sensor connections, and wiring integrity. Always refer to the manual for detailed solutions and maintenance tips to ensure optimal performance and resolve issues promptly. Regular checks can prevent major problems.
6.1 Diagnosing Power and Battery Problems
Power issues with the Hunter Node 200 often stem from low battery levels or faulty connections. Check the battery indicator to ensure it’s not depleted. Verify that the batteries are installed correctly and are of the recommended type. If the controller fails to turn on, inspect the wiring for damage or corrosion. Ensure all connections are secure. Replace batteries if necessary, and consult the manual for troubleshooting steps to restore functionality.
6.2 Resolving Sensor and Connectivity Issues
Sensor and connectivity issues with the Hunter Node 200 can often be resolved by resetting the controller or re-pairing Bluetooth devices. Ensure sensors like Freeze-Clik are properly connected and compatible. Check for firmware updates, as outdated software may cause malfunctions. If wireless connectivity fails, restart the controller and ensure devices are within range. Consult the manual for detailed troubleshooting steps to restore sensor functionality and Bluetooth communication effectively.
6.3 Fixing Wiring and Solenoid Malfunctions
Check wiring connections for damage or corrosion and ensure they are securely attached to both the controller and solenoids. Test solenoids by manually activating them using the controller’s override feature. Replace faulty solenoids with compatible Hunter DC-latching solenoids (P/N 458200). Verify wiring diagrams in the manual for correct installation. If issues persist, reset the controller or consult a professional for assistance.

Maintenance and Upkeep
Regularly clean the controller and sensors to ensure optimal performance. Replace batteries every 2-3 years or when the low-battery indicator appears. Update software periodically for enhanced functionality.
7.1 Battery Care and Replacement
Regularly inspect the battery for signs of wear or corrosion. Replace batteries every 2-3 years or when the low-battery indicator appears. Use high-quality, rechargeable batteries for optimal performance. Ensure proper disposal of old batteries. Clean the battery contacts periodically to maintain good connectivity. Avoid exposing batteries to extreme temperatures, as this may reduce their lifespan. Always follow the manufacturer’s guidelines for battery replacement to ensure the controller operates efficiently.
7.2 Cleaning and Protecting the Controller
Use a soft, dry cloth to gently wipe the controller’s exterior, removing dirt or debris. Avoid harsh chemicals or liquids, as they may damage the casing or electrical components. Protect the controller from direct sunlight and moisture by mounting it in a shaded, weather-resistant location. Regularly inspect the unit for signs of wear or pests. Ensure the controller is securely fastened to prevent vibration or movement damage. This maintenance ensures optimal performance and longevity.
7.3 Software Updates and Firmware
Regularly check for software updates to ensure optimal performance of your Hunter Node 200 controller. Updates may enhance features, fix issues, or improve compatibility. Use the Hunter app via Bluetooth to check for firmware updates. Visit the Hunter website for the latest firmware versions and follow the provided instructions to install updates. Always back up settings before updating to prevent data loss. Keeping firmware current ensures reliable operation and access to new features.

The Hunter Node 200 is a valuable asset for efficient irrigation, offering convenience and reliability. Its features promote water conservation and ease of use, ensuring optimal watering schedules. Refer to this manual for effective operation and troubleshooting.
8.1 Summary of Key Features and Benefits
The Hunter Node 200 offers a battery-operated design with Bluetooth connectivity for remote control. It supports up to 2 solenoids, providing flexibility for small landscapes. Key features include easy programming, manual overrides, and compatibility with sensors like Freeze-Clik. Its water-conserving capabilities and expandable design make it ideal for efficient irrigation. The controller’s user-friendly interface and reliability ensure optimal watering schedules, catering to both residential and commercial needs effectively;
8.2 Encouragement to Use the Manual Effectively
Referencing the Hunter Node 200 manual ensures proper installation, programming, and maintenance. It provides detailed troubleshooting guides and tips for optimal water conservation. By following the manual, users can maximize the controller’s features, such as Bluetooth connectivity and sensor compatibility. Regularly reviewing the manual helps users adapt to updates and improve their irrigation system’s efficiency, ensuring long-term performance and reliability for their landscaping needs.