
The Clean Remote Guide Button simplifies navigation for users‚ offering easy access to channel listings and program details. Designed for healthcare settings‚ it ensures patient satisfaction with intuitive functionality.
1.1 Overview of the Clean Remote
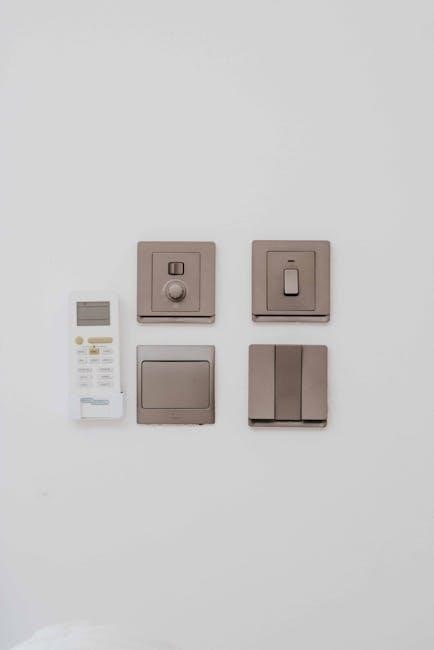
The Clean Remote is a healthcare-focused TV remote control designed for simplicity and patient satisfaction. Compatible with major TV brands like LG‚ Samsung‚ and RCA‚ it features a hidden battery compartment to prevent tampering. It operates via 2 AAA batteries and supports Comcast and other cable systems. The remote lacks a Menu button to avoid unintended setting changes‚ ensuring easy navigation for users.
1.2 Importance of the Guide Button
The Guide Button is a key feature of the Clean Remote‚ enabling users to access electronic program guides (EPG) for channel listings and showtimes. This functionality enhances user experience by simplifying navigation‚ especially in healthcare settings where ease of use is crucial. The Guide Button ensures patients can independently browse and select programs‚ promoting entertainment and satisfaction during their stay.
Common Issues with the Clean Remote Guide Button
Common issues include dirt or grime obstructing the Guide Button‚ causing malfunctions‚ and battery problems leading to inconsistent functionality. Regular cleaning and maintenance are essential.
2.1 Why the Guide Button Might Not Work
The Guide Button may stop working due to dirt or grime buildup on the remote’s surface‚ obstructing its functionality. Additionally‚ battery issues or weak connections can prevent the button from responding. In some cases‚ compatibility problems with certain TV models or cable boxes might also cause malfunctions. Regular cleaning and ensuring proper battery installation can often resolve these issues effectively.
2.2 Troubleshooting Steps for a Non-Functional Guide Button
Start by cleaning the remote’s buttons with rubbing alcohol and a cotton swab to remove dirt and grime. Ensure batteries are properly installed and replaced if weak. Reset the remote by holding the Setup button for 3 seconds‚ then pressing the CC button until the LED blinks. If issues persist‚ check compatibility with your TV or cable box. Refer to the user manual or contact manufacturer support for further assistance.

Cleaning and Maintaining the Clean Remote
Regularly clean the remote with a cotton swab and rubbing alcohol to remove dirt. Sanitize frequently to maintain hygiene‚ especially in healthcare settings. Ensure proper battery installation for optimal functionality.
3.1 Best Practices for Cleaning the Remote
Use a soft cloth or cotton swab with rubbing alcohol to gently wipe down the remote‚ paying attention to buttons and crevices. Avoid harsh chemicals or excessive moisture. Regular sanitization is crucial‚ especially in healthcare settings‚ to maintain hygiene and prevent germ spread. Always ensure the remote is dry before use to prevent damage. Cleaning regularly enhances functionality and prolongs the device’s lifespan.
3.2 How to Remove Dirt and Grime from Buttons
Dip a cotton swab in isopropyl alcohol and gently scrub the buttons‚ focusing on areas with visible buildup. Avoid harsh chemicals or abrasive materials. Use a dry cloth to wipe away residue and moisture. Regular cleaning prevents grime accumulation‚ ensuring buttons remain responsive. This method is effective for maintaining the remote’s functionality and hygiene‚ especially in high-use environments like healthcare facilities.
Resetting the Clean Remote
Press and hold the Setup button for 3 seconds‚ then press and hold the CC button until the red LED blinks quickly 3 times. This resets the code list‚ ensuring proper functionality and connection with your TV or cable box. Regular resets can resolve issues like unresponsive buttons or incorrect codes.
4.1 Step-by-Step Guide to Resetting the Remote
To reset the Clean Remote‚ press and hold the Setup button for 3 seconds. While holding Setup‚ press the CC button until the red LED blinks rapidly three times. Release both buttons once the LED signal is observed. This process restores the remote to its default settings‚ allowing it to re-sync with your TV or cable box effectively. Ensure the remote is pointed at the device during the reset process for optimal results.
4.2 Resetting the Code List for Proper Functionality
Resetting the code list ensures the remote operates correctly by clearing outdated or conflicting codes. Press and hold the Setup button for 3 seconds‚ then press the CC button until the red LED blinks three times. This action resets the code list to its default state‚ enabling the remote to sync properly with your TV or cable box. Perform this step if the remote fails to recognize your device after initial setup.

Using the Guide Button in Healthcare Settings
The Guide button enhances patient satisfaction by simplifying TV navigation in healthcare settings. It ensures easy access to channel listings and program details for both staff and patients.
5.1 Navigating the TV Menu with the Guide Button
The Guide button simplifies TV menu navigation in healthcare settings‚ providing easy access to channel listings and program details. Patients and staff can quickly browse options‚ enhancing satisfaction. Its intuitive design minimizes confusion‚ ensuring seamless functionality. This feature is particularly beneficial in healthcare environments‚ where ease of use and efficiency are crucial for both patients and staff.
5.2 Ensuring Patient Satisfaction with the Clean Remote
The Clean Remote enhances patient satisfaction by providing a user-friendly interface for TV navigation. Its simplicity and responsiveness allow patients to easily access entertainment‚ reducing stress. The hidden battery compartment and durable design ensure reliability‚ minimizing interruptions. Additionally‚ compatibility with major TV brands guarantees seamless functionality‚ making it an ideal solution for healthcare environments focused on patient comfort and satisfaction.
Battery Maintenance for the Clean Remote
The Clean Remote uses two AAA batteries‚ accessed via a hidden compartment. Regularly check battery levels and replace them to ensure uninterrupted functionality and optimal performance.
6.1 Tips for Replacing Batteries
To replace batteries in the Clean Remote‚ locate the hidden compartment and ensure the remote is facing you. Insert two AAA batteries‚ aligning the positive and negative terminals correctly. Avoid mixing old and new batteries‚ as this can reduce performance. Dispose of used batteries responsibly. For optimal functionality‚ use high-quality batteries and check expiration dates before installation. Regularly inspect batteries for corrosion or damage to maintain reliable operation.
6.2 Hidden Battery Compartment Features
The Clean Remote features a hidden battery compartment with an attached door‚ designed to prevent unauthorized access and battery theft. This secure design ensures batteries remain in place‚ especially in healthcare settings. The compartment requires deliberate opening‚ adding an extra layer of security. It uses two AAA batteries‚ ensuring reliable performance. The hidden feature also helps maintain a sleek‚ tamper-proof design‚ ideal for public or patient environments.

Compatibility and Functionality
The Clean Remote is compatible with over 250 brands of commercial and retail TVs‚ ensuring broad functionality. It works seamlessly with Comcast and other cable systems‚ enhancing user convenience in healthcare settings.
7.1 Compatible Devices and TV Brands
The Clean Remote is designed to work with leading TV brands like LG‚ Samsung‚ and RCA‚ ensuring compatibility across various devices. It also supports Philips Hospitality TVs‚ making it a versatile choice for healthcare environments. Additionally‚ it is compatible with major cable systems such as Comcast‚ providing seamless control for both TVs and cable boxes. This broad compatibility ensures reliable performance in diverse settings.
7.2 Limitations of the Clean Remote
The Clean Remote has some limitations‚ such as incompatibility with DVD players‚ VCRs‚ and combination units. It cannot control TV settings in hospitality modes and lacks a Menu button to prevent unauthorized changes. Additionally‚ it may not work with all TVs in hotels due to built-in systems. These limitations ensure its primary function remains focused on essential operations for patient satisfaction and ease of use.
Advanced Features of the Clean Remote
The Clean Remote offers customization options and a Setup button for code searching‚ ensuring compatibility and ease of use in healthcare settings.

8.1 Customizing the Remote for Specific Needs
Customizing the Clean Remote allows tailored functionality‚ ensuring it meets specific user requirements. By programming buttons and adjusting settings‚ users can streamline operations for healthcare environments‚ enhancing efficiency and patient satisfaction.
8.2 Using the Setup Button for Code Search
Press and hold the Setup button for 3 seconds‚ then press the CC button while still holding Setup. The red LED will blink quickly 3 times‚ confirming the code list reset. This process allows the Clean Remote to search for compatible codes from the beginning. After resetting‚ restart the code search process to ensure proper functionality with your TV or cable box.

Customer Support and Resources
For assistance‚ contact Clean Remote LLC at 1-800-827-2546 or email protected. Visit their website for user manuals‚ guides‚ and troubleshooting tips to resolve any issues promptly.
9.1 Contacting the Manufacturer for Assistance
For support‚ reach out to Clean Remote LLC at 1-800-827-2546 or via email at email@cleanremote.com. Their dedicated team provides troubleshooting‚ warranty inquiries‚ and repair services. Visit their official website for additional resources‚ including user manuals and FAQs‚ ensuring quick resolution to any issues with your Clean Remote Guide Button.
9.2 Accessing User Manuals and Guides Online
Visit the official Clean Remote website to download user manuals and guides for specific models like CR1R or CR4. These resources provide detailed instructions for troubleshooting‚ setup‚ and functionality. Additionally‚ compatibility charts and FAQs are available to address common issues‚ ensuring optimal use of the Clean Remote Guide Button in various settings‚ including healthcare and hospitality environments.
The Clean Remote Guide Button ensures optimal performance and patient satisfaction. Proper battery maintenance and troubleshooting practices enhance its longevity. Manufacturers continuously improve its functionality for better user experiences.
10.1 Final Tips for Optimizing the Clean Remote Experience
Regularly clean the buttons with alcohol to prevent dirt buildup. Replace batteries timely and ensure proper alignment. Reset the remote when facing issues and use the Setup button for code search. Always point the remote directly at the TV for optimal signal reception. Finally‚ refer to the user manual for advanced customization options to enhance your experience with the Clean Remote Guide Button.
10.2 The Future of Remote Control Technology
The future of remote control technology promises advanced features like voice commands‚ gesture control‚ and enhanced app integration. Innovations such as antimicrobial materials and energy-efficient designs are expected to dominate. The Clean Remote will likely evolve with these trends‚ offering seamless compatibility with smart devices and improved user experiences‚ ensuring it remains a leader in healthcare and hospitality settings for years to come.